With the destruction of the first Death Star, the Rebel Alliance had dealt a demoralizing blow to the Empire. They had won the battle, but the war was far from over. The Rebels' heroic actions provoked the wrath of the Imperial giant that had once dismissed any chance of a Rebel victory. Swift retaliation was the Emperor's top objective, unleashing the full fury and power of the Empire to hunt down the Rebels and exact revenge upon them. In the distant and unknown world of Hoth the Rebels hide, yet their veil of snow will soon be lifted by an army set on extinguishing the Rebel Alliance once and for all. New heroes will arise from both factions to help sway the tides of the Galactic Civil War. The price of victory is high, but the payoff is freedom...
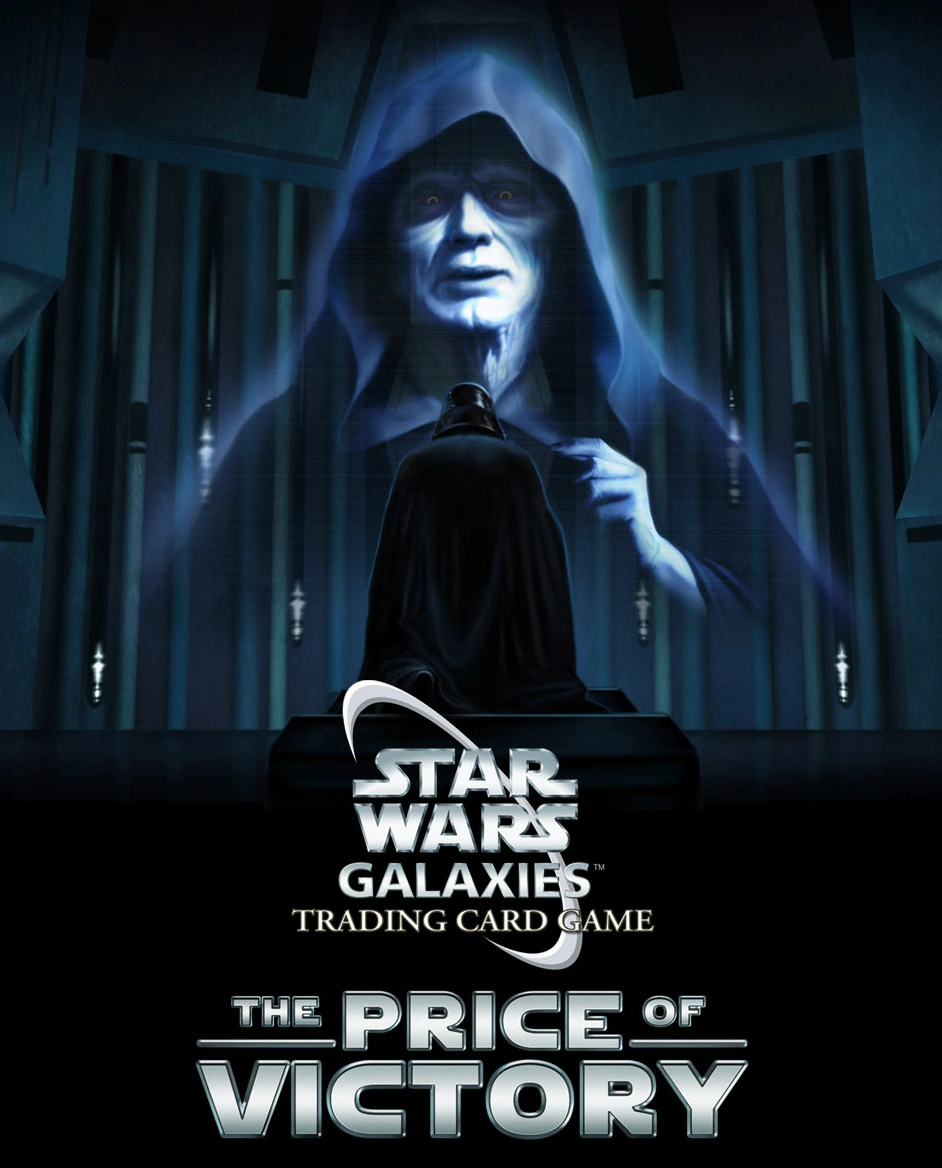
The Price of Victory was launched December 14, 2010.
Card gallery[]
.JPG "2-1B Surgical Droid (card).JPG (121 KB)")
.JPG "501st Stormtrooper (card).JPG (103 KB)")
.JPG "501st Trooper Captain (card).JPG (108 KB)")
.JPG "501st Trooper Sergeant (card).JPG (96 KB)")
.JPG "A New Enemy (card).JPG (112 KB)")
.JPG "Ace Field Pack (card).JPG (92 KB)")
.JPG "Alliance Cold Weather Backpack (card).JPG (114 KB)")
.JPG "Altering the Deal (card).JPG (101 KB)")
.JPG "Always In Motion (card).JPG (114 KB)")
.JPG "Anti-Infantry Battery (card).JPG (111 KB)")
.JPG "Any Methods Necessary (card).JPG (98 KB)")
.JPG "Arachne Widow (card).JPG (113 KB)")
.JPG "Armed Protocol Droid (card).JPG (120 KB)")
.JPG "Armored Tauntaun Statue (card).JPG (80 KB)")
.JPG "Arrest the Traitors (card).JPG (95 KB)")
.JPG "Assured Strike (card).JPG (109 KB)")
.JPG "Asteroid Field (card).JPG (100 KB)")
.JPG "Attack Pattern Delta (card).JPG (113 KB)")
.JPG "Avenger (card).JPG (91 KB)")
.JPG "Away to Safety (card).JPG (105 KB)")
.JPG "Bad Feeling (card).JPG (104 KB)")
.JPG "Bad Weather (card).JPG (104 KB)")
.JPG "Barrage Attack (card).JPG (106 KB)")
.JPG "Battle Stations (card).JPG (114 KB)")
.JPG "Bio-Scanner (card).JPG (94 KB)")
.JPG "Black Sun Boarder (card).JPG (100 KB)")
.JPG "Black Sun Contact (card).JPG (103 KB)")
.JPG "Black Sun Engineer (card).JPG (104 KB)")
.JPG "Blizzard 1 (card).JPG (98 KB)")
.JPG "Blizzard AT-AT (card).JPG (101 KB)")
.JPG "Blizzard Pilot (card).JPG (105 KB)")
.JPG "Boarding Party (card).JPG (92 KB)")
.JPG "Boba Fett 6 (card).JPG (96 KB)")
.JPG "Boba Fett's Blaster (card).JPG (99 KB)")
.JPG "Bravado (card).JPG (114 KB)")
.JPG "Bren Derlin 6 (card).JPG (111 KB)")
.JPG "C-3PO 6 (card).JPG (111 KB)")
.JPG "C-3PO Backpack (card).JPG (74 KB)")
.JPG "Captain Lennox (card).JPG (103 KB)")
.JPG "Captain Needa 6 (card).JPG (88 KB)")
.JPG "Captain Piett 6 (card).JPG (97 KB)")
.JPG "Carbon Freezing Facility (card).JPG (105 KB)")
.JPG "Carbon-Freezing Chamber Diorama (card).JPG (109 KB)")
.JPG "Cartridge Belt (card).JPG (99 KB)")
.JPG "CC-V Legion Cryo Projector (card).JPG (108 KB)")
.JPG "Chancellor's Robe (card).JPG (106 KB)")
.JPG "Checkpoint (card).JPG (102 KB)")
.JPG "Choose a Promo (card).JPG (113 KB)")
.JPG "Clash of Lightsabers (card).JPG (111 KB)")
.JPG "Clear Your Mind (card).JPG (113 KB)")
.JPG "Cloud City Lamp (card).JPG (53 KB)")
.JPG "Cloud City Pod Car (card).JPG (152 KB)")
")
.JPG "Cloud City Shelves (card).JPG (75 KB)")
.JPG "Combat Knife (card).JPG (111 KB)")
.JPG "Com-Control Officer (card).JPG (121 KB)")
.JPG "Com-Scan (card).JPG (112 KB)")
.JPG "Contentious Opportunity (card).JPG (115 KB)")
.JPG "Contingency Planning (card).JPG (97 KB)")
.JPG "Controlled Burst (card).JPG (101 KB)")
.JPG "Coret Bhan 6 (card).JPG (119 KB)")
.JPG "Could City Police (card).JPG (105 KB)")
.JPG "Cross Fire (card).JPG (84 KB)")
.JPG "Dagobah Indoor Garden (card).JPG (71 KB)")
.JPG "Dark Sash (card).JPG (97 KB)")
.JPG "Dark Side Prophet (card).JPG (104 KB)")
.JPG "Dark Time (card).JPG (114 KB)")
.JPG "Dark Trooper (card).JPG (116 KB)")
.JPG "Darkwalker Adjutant (card).JPG (104 KB)")
.JPG "Darkwalker Aegis Guard (card).JPG (109 KB)")
.JPG "Darkwalker Bloodlord (card).JPG (114 KB)")
.JPG "Darkwalker Deeds (card).JPG (106 KB)")
.JPG "Darkwalker Scientist (card).JPG (113 KB)")
.JPG "Darkwalker Underlord (card).JPG (122 KB)")
.JPG "Darth Vader's Lightsaber (card).JPG (116 KB)")
.JPG "DC-15 Blaster Rifle (card).JPG (120 KB)")
.JPG "Dealing with the Guild (card).JPG (119 KB)")
.JPG "Deck Officer (card).JPG (121 KB)")
.JPG "Deflector Shield (card).JPG (123 KB)")
.JPG "Demolitionmech (card).JPG (124 KB)")
.JPG "Desperate Search (card).JPG (109 KB)")
.JPG "Destroy the Escaped Wookiees (card).JPG (104 KB)")
.JPG "Detention Gate (card).JPG (99 KB)")
.JPG "Disruptor Rifle (card).JPG (116 KB)")
.JPG "Disturbance (card).JPG (99 KB)")
.JPG "Echo Base Scout (card).JPG (114 KB)")
.JPG "Echo Base Shield Plans Painting (card).JPG (107 KB)")
.JPG "Echo Base Trench Officer (card).JPG (112 KB)")
.JPG "Echo Base Trooper (card).JPG (119 KB)")
.JPG "Emergency Repairs (card).JPG (110 KB)")
.JPG "Emperor Palpatine 6 (card).JPG (94 KB)")
.JPG "Emperor Palpatine Hologram (card).JPG (75 KB)")
.JPG "Energey Shield (card).JPG (114 KB)")
.JPG "EV-9D9 (card).JPG (89 KB)")
.JPG "Exogorth Gloves (card).JPG (75 KB)")
.JPG "Expert Translator (card).JPG (130 KB)")
.JPG "Facility Administrator (card).JPG (103 KB)")
.JPG "Falling Avalanche (card).JPG (140 KB)")
.JPG "Final Failure (card).JPG (95 KB)")
.JPG "First Responder Body Armor (card).JPG (124 KB)")
.JPG "Fluid Riposte (card).JPG (114 KB)")
.JPG "Force Battle (card).JPG (95 KB)")
.JPG "Force Insanity (card).JPG (108 KB)")
.JPG "Force Meld (card).JPG (108 KB)")
.JPG "Force Persuasion (card).JPG (103 KB)")
.JPG "Force Pike (card).JPG (96 KB)")
.JPG "Force Pull (card).JPG (113 KB)")
.JPG "Force Push (card).JPG (118 KB)")
.JPG "Force Warrior (card).JPG (121 KB)")
.JPG "Four Sages of Dwartii (card).JPG (104 KB)")
.JPG "Freedom Fighters (card).JPG (125 KB)")
.JPG "Full of Surprises (card).JPG (109 KB)")
.JPG "Gaderffi Baton (card).JPG (90 KB)")
")
.JPG "GR-75 Medium Transport (card).JPG (107 KB)")
.JPG "Ground Assault (card).JPG (99 KB)")
.JPG "Han Solo 6 (card).JPG (104 KB)")
.JPG "Han Solo's Blaster (card).JPG (116 KB)")
.JPG "Hungry Exorgoth Diorama (card).JPG (105 KB)")
.JPG "HX-2 Antipersonnel Mine (card).JPG (106 KB)")
.JPG "I'm With You (card).JPG (124 KB)")
.JPG "Imperial Navy First Officer (card).JPG (102 KB)")
.JPG "Imperial Navy Gunner (card).JPG (100 KB)")
.JPG "Imperial Navy Helmsman (card).JPG (111 KB)")
.JPG "Imperial Navy Trooper (card).JPG (97 KB)")
.JPG "Imperial Starfleet (card).JPG (106 KB)")
")
.JPG "Imposing Defense (card).JPG (98 KB)")
.JPG "In the Trenches (card).JPG (114 KB)")
.JPG "Innocent Cargo (card).JPG (128 KB)")
.JPG "Ion Blast (card).JPG (106 KB)")
.JPG "Ionized Tibanna Gas Display (card).JPG (79 KB)")
.JPG "Issued Commando Pendant (card).JPG (89 KB)")
.JPG "It Is the Future You See (card).JPG (126 KB)")
.JPG "Jawa Avenger (card).JPG (122 KB)")
.JPG "Jawa Protector (card).JPG (110 KB)")
.JPG "Jawa Warlord (card).JPG (104 KB)")
.JPG "Jedi Archaeologist (card).JPG (124 KB)")
.JPG "Jedi Archaeology (card).JPG (115 KB)")
.JPG "Jedi Consular (card).JPG (116 KB)")
.JPG "Jedi General (card).JPG (127 KB)")
.JPG "Jedi Investigator (card).JPG (114 KB)")
.JPG "Jedi Master Yoda Painting (card).JPG (99 KB)")
.JPG "Jedi Weapon Master (card).JPG (111 KB)")
.JPG "Jeffren Brek 6 (card).JPG (98 KB)")
.JPG "Jerrol Blendin (card).JPG (102 KB)")
.JPG "Krix Swiftshadow (card).JPG (99 KB)")
.JPG "Landing Permit (card).JPG (106 KB)")
.JPG "Lando Calrissian 5 (card).JPG (97 KB)")
.JPG "Lando Calrissian 6 (card).JPG (99 KB)")
")
.JPG "Laser Trip Mine (card).JPG (88 KB)")
.JPG "Leave the City (card).JPG (105 KB)")
.JPG "Link-Steel Reinforced Gloves (card).JPG (104 KB)")
.JPG "Lobot (card).JPG (108 KB)")
.JPG "Logistics Officer (card).JPG (114 KB)")
.JPG "Luke Skywalker 6 (card).JPG (104 KB)")
.JPG "Luke Skywalker's Lightsaber (card).JPG (114 KB)")
.JPG "Lying in Wait (card).JPG (91 KB)")
.JPG "Marcus Gaw (card).JPG (101 KB)")
.JPG "Maximum Firepower (card).JPG (104 KB)")
.JPG "Medal for Distinguished Service (card).JPG (110 KB)")
.JPG "Might of the Empire (card).JPG (99 KB)")
.JPG "Millennium Falcon 6 (card).JPG (121 KB)")
.JPG "Mind What You Have Learned (card).JPG (103 KB)")
.JPG "Minelaying Operation (card).JPG (87 KB)")
.JPG "Mining Colony (card).JPG (98 KB)")
.JPG "Mission from CorSec (card).JPG (112 KB)")
.JPG "Mynock (card).JPG (97 KB)")
.JPG "Nak'tra Crystal Rifle (card).JPG (112 KB)")
.JPG "Namman Cha 6 (card).JPG (114 KB)")
.JPG "Necklace of Dark Fury (card).JPG (99 KB)")
.JPG "Not Yet (card).JPG (113 KB)")
.JPG "Obi-Wan Kenobi 6 (card).JPG (98 KB)")
.JPG "One-Two Pummel (card).JPG (103 KB)")
.JPG "Press the Advantage (card).JPG (92 KB)")
.JPG "Quick Reflexes (card).JPG (106 KB)")
.JPG "R2-D2 6 (card).JPG (122 KB)")
.JPG "R2-D2 on Dagoban Statue (card).JPG (53 KB)")
.JPG "Rachi Sitra 6 (card).JPG (108 KB)")
.JPG "Raid on Echo Base Diorama (card).JPG (72 KB)")
.JPG "Rebel Rescue (card).JPG (121 KB)")
.JPG "Rebels' Kiss Painting (card).JPG (71 KB)")
.JPG "Relby-K23 Pistol (card).JPG (96 KB)")
.JPG "Remove the Rival (card).JPG (107 KB)")
.JPG "Rendezvous Point (card).JPG (116 KB)")
.JPG "Renegotiate the Deal (card).JPG (98 KB)")
.JPG "Rescue the Double Agents (card).JPG (88 KB)")
.JPG "Rescue the Slavers (card).JPG (106 KB)")
.JPG "Revitalize (card).JPG (112 KB)")
.JPG "Rising Whirlwind (card).JPG (126 KB)")
.JPG "Rogue Gunner (card).JPG (128 KB)")
.JPG "Rogue Leader (card).JPG (112 KB)")
.JPG "Rogue Pilot (card).JPG (123 KB)")
.JPG "Rogue Snowspeeder (card).JPG (116 KB)")
.JPG "SpecForce Ambush (card).JPG (116 KB)")
.JPG "Secret Base (card).JPG (103 KB)")
.JPG "Secure the Data (card).JPG (97 KB)")
.JPG "Sith Ambush (card).JPG (115 KB)")
.JPG "Sith Cultist (card).JPG (112 KB)")
.JPG "Sith Marauder (card).JPG (112 KB)")
.JPG "Sith Minion (card).JPG (108 KB)")
_(card).JPG "Slave I Replica (ITV) (card).JPG (76 KB)")
.JPG "Smooth Move (card).JPG (96 KB)")
.JPG "Snowspeeder Familiar (card).JPG (75 KB)")
.JPG "Stolen Artifact (card).JPG (105 KB)")
.JPG "Stormtrooper Rifleman (card).JPG (101 KB)")
.JPG "Sunrider's Destiny (card).JPG (108 KB)")
.JPG "Tempered Aggression (card).JPG (124 KB)")
.JPG "The Big Cover-Up (card).JPG (100 KB)")
.JPG "The Emperor Commands (card).JPG (101 KB)")
.JPG "The Emperor's Bidding (card).JPG (109 KB)")
.JPG "The Heights of Cloud City Diorama (card).JPG (74 KB)")
.JPG "The Price of Victory (card).JPG (117 KB)")
.JPG "The Price of Victory Painting (card).JPG (104 KB)")
.JPG "Throne of Dark Meditation (card).JPG (73 KB)")
.JPG "Tian Chyler (card).JPG (113 KB)")
.JPG "TIE Hangar (card).JPG (102 KB)")
.JPG "TIE Interceptor (card).JPG (106 KB)")
.JPG "TIE Pilot (card).JPG (104 KB)")
.JPG "Tonnika Sisters (card).JPG (102 KB)")
.JPG "Toryn Farr (card).JPG (114 KB)")
.JPG "Tractor Beam (card).JPG (109 KB)")
.JPG "Trandoshan Slaver (card).JPG (125 KB)")
.JPG "Trench Warfare (card).JPG (136 KB)")
.JPG "Tripping the Walkers (card).JPG (132 KB)")
.JPG "Twin Strike (card).JPG (104 KB)")
.JPG "Twin-Pod Cloud Car (card).JPG (98 KB)")
.JPG "Twin-Pod Cloud Car Painting (card).JPG (71 KB)")
.JPG "Ugnaught Mechanic (card).JPG (106 KB)")
.JPG "Ugnaught Miner (card).JPG (98 KB)")
.JPG "Ugnaught Worker (card).JPG (105 KB)")
.JPG "Under Arrest (card).JPG (108 KB)")
.JPG "Unhindered Charge (card).JPG (118 KB)")
.JPG "Useless to Resist (card).JPG (105 KB)")
.JPG "Vran Tristen (card).JPG (116 KB)")
")
.JPG "Wedge Antilles 6 (card).JPG (116 KB)")
.JPG "Wing Guard Corporal (card).JPG (96 KB)")
.JPG "Wing Guard Sergeant (card).JPG (92 KB)")
.JPG "Y-8 Mining Ship (card).JPG (105 KB)")
.JPG "Yoda (card).JPG (107 KB)")
.JPG "Yoda Backpack (card).JPG (72 KB)")
.JPG "Yoda Raising X-wing Diorama (card).JPG (109 KB)")
")
.png "Yoda's Dagobah Hut (card).png (260 KB)")
.JPG "Young Learner (card).JPG (111 KB)")
.JPG "Yoxgit (card).JPG (108 KB)")
Scenarios[]
You are at the Battle of Hoth when the evacuation of Echo Ease leads to General Crix Madine being captured by Imperial Snowtroopers. The Alliance uses any measures necessary to follow his path. The trail leads to the Tyrant, the depths of space, and then to Cloud City.
Dark Side Campaign: A Fine Catch[]
From the Echo Base battlefield on Hoth, Imperial forces have captured the traitor, General Crix Madine. As Rebel forces rally, the Imperials fight off desperate rescue attempts and raids by the rebels. The trail leads from Hoth to the Tyrant, the depths of space and then to Cloud City.
Scenario 1: Secure The Prisoner[]
Escort an important Imperial prisoner to a waiting shuttle and fight the Rebel ambush.
Your service to the Empire secures a special assignment with the scout detachment of the 501st Legion at the Battle of Hoth. When the walkers fall to the harpoons of the Rebel snowspeeders at the Battle of Hoth, you are there. Imperial morale holds its breath while the ground troops regroup. The finest officers of the Empire assemble their snowtroopers for an infantry assault on the trenches that protect Echo Base.
The 501st will be with the first wave of the attackers, and you're getting your equipment ready. Then an officer pulls you aside. 'You've got a special escort assignment,' he says. 'We've captured a valuable prisoner. He was once the leader of the Storm Commandos. This scum has defected to the Rebels.'
He takes you to a squad of snowtroopers led by an Imperial captain. They hold three prisoners in binders. One of them is a Rebel general. 'Take General Madine and his aides to the shuttle and then secure him aboard the Tyrant,' says the officer.
You're disappointed to miss the chance to attack the Rebel base, but this is an important mission and sure to be a credit to your career. The shuttle is landed only a kilometer away. However, the snow falls heavily and visibility is poor.
You have only two hundred meters to go when bolts of blaster fire thud into the snow near your position. 'Move the prisoners to the rear!' you say. The troopers fall into battle formation and start firing their blaster carbines. The attackers are a group of Rebel commandos, better armed and trained than the regular Echo Base troopers. They're taking Madine's capture very seriously.
During the firefight, the Rebels rescue Madine's aides. However, you still have the general in custody. The rear guard action fought by your snowtroopers holds off the Rebels long enough. You board the shuttle with the most important prisoner. As the shuttle lifts off from the surface of Hoth, you can see below the battle near the trenches that assures you the Empire will capture Echo Ease.
Scenario 2: Report to Captain Lennox[]
Battle a boarding party of Rebel commandos to keep the important prisoner in the brig.
Your shuttle lands in the docking bay of the Star Destroyer Tyrant. A squad of Imperial Navy Troopers meets you there. 'We'll take the prisoner to the detention block,' says one of them. 'You're to report to the Captain on the bridge.'
In the huge, windowed bridge of the Tyrant, Captain Lennox greets you warmly. 'What news do you have of the Battle of Hoth?' he asks. You tell him of the walkers' defeat, and the troops rallying to attack Echo Base. While you describe the failed attempt by the Rebel commandos to rescue Madine, the Tyrant shudders with an explosive impact. Half of the data screens on the bridge blink out. Sirens sound as a technician says to Lennox, 'Ion cannon, sir. Turbolaser targeting disabled.'
'Get those systems up and running, Helmsman,' says Lennox. 'We're blind. We could be boarded by a Rebel ship at any minute.' Then he turns to you. 'Go to the brig and make sure our prisoner is secure,' he says.
When you arrive at the detention block, all is quiet until one of the troopers gets an urgent comlink transmission. 'We've been alerted, sir,' he says. 'Rebels have boarded the Tyrant.'
Explosive charges blow the brig door open and it lands on the deck with a clang. Another party of Rebel commandos, this time led by a Major, pours into the cell block. The Navy troopers begin firing, and you must defeat the Rebel boarders to keep Madine secure in his cell.
You were sure your blaster shot brought down the Rebel leader. Then everything went black. When you wake up, the Alliance commandos are gone, and Madine's cell stands wide open. Since when do Rebels have stun grenades? You thought only Imperial troops used them.
You locate a comlink to make your report. 'The Rebels have Madine,' you say. Captain Lennox sighs. 'I'm aware,' he says. 'They took him to the docking bay and hijacked a shuttle. They've returned to Hoth, and the Tyrant is still ion shocked. There's nothing we can do.'
Scenario 3: Before the Storm[]
An assignment from the Dark Lord of the Sith leads to an encounter with a Jedi Knight.
You're called to the ready room of Captain Lennox for a conference. 'We've received a communication. From Lord Vader,' he says. You take a seat and a hologram of the Dark Lord of the Sith appears.
'Now that the operation on Hoth has concluded, I have a new assignment for the Tyrant,' says the image of Darth Vader. 'Go to the Bespin system. Remove a Jedi diplomat who undermines the Empire's negotiations on Cloud City. You failed to capture the traitor. Do not fail me again.' With that ominous threat, the hologram ends. 'Take care of this Jedi scum,' says Lennox.
Two days later, the Tyrant enters the Bespin system. A shuttle takes you to a landing pad on Cloud City. A slim, robed figure waits there. 'I am Rachi Sitra,' she says. She removes her hood and you see her Twi'lek head tails. Her eyes dart for a moment to the stormtroopers coming down the shuttle ramp behind you.
'We have much to discuss,' you say. The blaster carbines of your troopers clatter into firing position. 'You are a member of the Rebel Alliance. The Empire has dealings with Cloud City that must be completed. You are an obstruction that must be removed.'
Rachi smiles slightly. 'This assignment will prove to be more difficult than a lackey like you can handle,' she says. A lightsaber ignites in her hand and she assumes a combat stance. 'Return to your Star Destroyer and leave Cloud City now.' With a simple hand gesture from you, the stormtroopers begin firing. The Jedi whirls her lightsaber to block the blaster bolts. The battle is joined.
The battle rages back and forth across the wide expanse of the Cloud City landing pad. Your superior numbers and Imperial training begin to decide the conflict. The Jedi is forced to retreat dangerously close to the edge.
With a dramatic leap, she escapes from your circle of stormtroopers and lands near an Actis snubfighter. The cockpit opens and she quickly climbs aboard. Before your troopers can react, the fighter lifts off and blasts away into the clouds of Bespin.
'We drove that Jedi out of Cloud City,' you say to your trooper squad leader. 'She won't interfere with the Empire's business here again.' The trooper nods in agreement.
Scenario 4: Cloud City Police[]
Amidst a chaotic evacuation, fight the Cloud City Wing Guard and their cyborg leader.
'I have dealt with the Jedi diplomat,' you report to the hologram image of Captain Lennox. 'I have another task for you,' says Lennox. 'Rebel sympathizers are meeting with contacts in the lower levels of Cloud City. Root them out and remove them as a threat.' Lennox provides intel that includes locations and names for you to investigate.
You descend level after level, moving from the landing pads atop the mining platform to the criminal underworld beneath. Citizens going about their business slink out of the way when your squad of stormtroopers marches past.
In Bespin's underworld, seedy criminal types lurk in the shadows. An illegal deal is being made on every dark corner. Dimly lit cantinas are meeting places for smugglers and slavers.
Arriving at one of locations mentioned in the intelligence report, you search for the clandestine Rebels and their Ugnaught contact. Everyone in the cantina stops talking when your squad enters.
Suddenly, an announcement blares from speakers throughout Cloud City. 'Attention! This is Lando Calrissian. The Empire has taken control of the city. I advise everyone to leave before more Imperial troops arrive.'
Panicked citizens pour out of the buildings and into the darkened street. Every passageway and plaza is choked with evacuating residents. As you try to find your way amidst the chaos, a group of Cloud City police block your path. Behind them is Calrissian's chief administrative aide, a cyborg named Lobot.
The policemen look to Lobot for instructions. He makes a few quick hand gestures without saying a word. The Cloud City troopers pull out their blaster pistols and take up combat positions. 'You are under arrest,' says a Wing Guard corporal. You'll have to fight your way out of this situation.
When his Wing Guard can't contain your Imperial stormtroopers, Lobot tells his men to cease fire and throws up his hands in surrender. They'll no longer impede your progress to the surface. Now it's time to find out what they know about the Rebels.
Scenario 5: Covering the Extraction[]
Make sure that Lord Vader's deal with Boba Fett is free of Rebel interference.
Lobot and his Cloud City policemen have surrendered to your squad of stormtroopers. The chief of security seems willing to cooperate in exchange for his life. 'I know the Rebels were meeting with an Ugnaught gang,' you say. 'Where are they now? What are their plans? As Calrissian's top aide, you must know.'
Lobot nods at his one of his Wing Guard. 'We're tracking the Rebels, as ordered by Lord Vader,' he says. Then he looks at a datapad. 'They're making their way toward landing pad 327. That's where the bounty hunter is taking the prisoner.'
'What prisoner?' you ask. 'Who is the bounty hunter?'
'Boba Fett has made a deal with Darth Vader to collect a bounty on a Rebel captain,' says the corporal. 'The Ugnaughts froze Han Solo in carbonite. The Rebels must be going there to stop Fett and rescue Solo.'
'Than that's where we're headed,' you say. The stream of panicked citizens throughout the streets of Cloud City lessens as more of them evacuate. When you approach the landing pad, you see a Firespray attack craft which must be Boba Fett's Slave I.
The famous bounty hunter blasts into the sky with his jetpack. Nearby, stormtroopers carry the carbonite frozen body of Han Solo on repulsorlifts. A group of Rebel commandos open fire on Fett. Lord Vader wants Fett to take this prisoner, so it's your job to stop the Rebels from rescuing Han Solo.
The Rebels are forced to fall back. Wedge rallies them to escape to another landing pad, but that's not your concern. Stormtroopers load the body of Captain Solo aboard Slave I.
As Boba Fett strides up the landing ramp. he stops for a moment to nod your way with a small salute. Soon, the sublight engines of Slave I roar to life. The starship lifts off from Cloud City and blasts away into the clouds of Bespin.
A shuttle takes you aboard the orbiting Tyrant once again. 'You dispatched the Jedi and stopped the Rebels from interfering with Lord Vader's deal,' says Captain Lennox in your debriefing. 'This is good work. I'm sure the Empire will soon have another assignment worthy of your many talents.'
Light Side Campaign: Rescue General Madine[]
When the evacuation of Echo Base during the Battle of Hoth leads to General Crix Madine being captured by Imperial Snowtroopers before he is able to evacuate, the Alliance takes any measures necessary to follow his path.
Scenario 1: Imperial Entaglements[]
You're defending a trench at the Battle of Hoth when Wedge Antilles gives you a special mission.
'Keep your heads down!' says Wedge Antilles. You're in a trench at the Battle of Hoth. Fresh from bringing down an AT-AT with his snowspeeder, Wedge has taken command of your detachment while the evacuation from Echo Base continues. A group of Imperial snowtroopers heads toward your emplacement while your unit lays down covering fire. 'Concentrate your fire on that squad to the right,' says Wedge.
An Echo Base trooper gives his comlink to Wedge. He speaks into if for a moment, and then springs into action. 'Come with me!' says Wedge, pointing at you. Grabbing your weapon, you follow him out of the trench as he jumps into his snowspeeder.
'General Madine has been taken by the Imps,' says Wedge. 'We're going to get him back.' He flips a few switches and the snowspeeder rises into the cold air of Hoth. You can see the battle still raging, as stormtroopers fire on the entrenched Rebels. From behind Echo Base, you see an Alliance transport blast away into the sky.
Your snowspeeder races across the icy plains. 'Squad of snowtroopers at three o'clock,' you say to Wedge. 'Good eye,' he says. 'I'll put the speeder down behind that ridge.' With a deft maneuver, Wedge lands your vehicle on the hard packed snow with a thud.
Looking over the ridge, you see General Madine in binders along with two members of his personal staff. The snowtrooper squad is led by a captain in Imperial uniform. The group heads for an Imperial shuttle a few hundred meters away.
'We've got to act fast,' you whisper to Wedge. 'Agreed,' says the Rebel officer, as he bounds over the ridge. He rushes forward, pulling his blaster as he runs. You follow him at a dead run towards the Imps.
You've rescued both members of Madine's staff that were captured with him. Unfortunately, that Imperial officer, Captain Brek, got away with the general himself. Before you can act, the two of them reach the waiting shuttle and it takes off into the wintry sky.
'This is no good,' says Wedge. 'Where did they say they were taking him?' you ask of the general's aides. 'Aboard the Tyrant,' says one. 'They're gonna take him to a prison on Dathomir!' says the other.
'I'll stay here with these two,' says Wedge. 'You take my speeder and get back to Echo Base. Tell Toryn Farr that you have to get aboard the Tyrant.'
'I can't fly a snowspeeder...' you say.
'It's easy, look here,' says Wedge, pointing in the cockpit as you get in. 'Throttle here, that's the stick.' He claps you on the shoulder and says with a grin, 'You'll be fine.'
The cockpit slams shut as you ease forward the throttle and pull back the stick. You rise uneasily into the air, and put the snowspeeder into a wide bank. Below, you see Wedge and the two aides waving. You punch the throttle and fly away towards Echo Base.
Scenario 2: Aboard the Tyrant[]
Battle a squad of Imperial Navy troopers led by a Sith to free General Madine.
Over the snowspeeder's comlink, you hear the anxious chatter. 'T-47 comin' in hot!' says one. 'Get the fire crews ready!' says another. 'I don't see gear down,' says a third. You fumble for the gear switch and hear the landing struts lock.
Your wobbly landing is a hard one, and the snowspeeder skids sideways on the metal surface of the Echo Base hangar. You screech to a halt with the starboard wing just inches from the wall. A deck officer says, 'What are you doing flying a T-47?'
'Wedge Antilles sent me back,' you say. 'I've got to see Toryn Farr.' The deck officer says, 'Alright then. Come this way.' He leads you through the corridors of Echo Base to the ion cannon control room.
'Chief?' says the officer as he leads you in. 'I'm very busy,' says the young officer as she turns to face you. 'Wedge Antilles said to tell Toryn Farr to get me aboard the Tyrant,' you say. 'Is that right?' says Toryn Farr. 'Well, you're in luck, I'm the one who makes that happen.' She turns to another technician. 'Target the Tyrant now. Fire!' she says. The room shudders with a blast from the heavy ion cannon above. The deck officer says, 'Come on, there's a shuttle ready in the hangar.'
Soon, you're boarding the Imperial Star Destroyer Tyrant with a squad of Rebel commandos. You've got to battle your way to the brig through a group of Navy troopers. Suddenly, a red lightsaber ignites and you see a dark-robed Sith among them. You get a bad feeling about this.
It's a fierce firefight, and when your troopers get the upper hand, the Sith escapes to another part of the starship. 'Glad to see you,' says Crix Madine as you open the door to his cell. 'Your aides are safe,' you say. 'Let's get out of here. General.'
In the docking bay, you commandeer a Lambda-class shuttle and return to the surface of Hoth. The battle is winding down and evacuations are nearly complete. A shuttle takes you aboard the Mon Calamari cruiser Champion that is heading for the Rendezvous Point.
Scenario 3: Clash in the Void[]
Jump into a snubfighter to defend your Mon Calamari cruiser from a TIE fighter attack.
Aboard the Mon Calamari cruiser Champion, you have evacuated from Hoth. Your next destination is the designated Rendezvous Point for the Alliance. You stand watch on the bridge as the ship prepares for the jump to lightspeed. Suddenly, alarms blare throughout the starship and the bridge crew members spring into action.
'Incoming starship,' says one scanner operator. 'Star Destroyer,' says another. 'Imperial-class... it's the Tyrant!' says a third. 'She's scrambling TIE fighters,' reports yet another technician.
'This is Captain Lennox of the Imperial Star Destroyer Tyrant,' says a voice over a comlink. 'You have General Crix Madine aboard. Give him to me, and I'll call off my attack.'
'There will be no deals,' says the captain of the Champion as he snaps off the comlink with the Tyrant. 'Launch fighters!' he says to the deck officer. Through the massive windows of the cruiser's bridge, you can see the X-wings and Y-wings of the ship's complement blasting into space.
'We've got to hold off the Tyrant long enough to make the jump to lightspeed,' says the captain. He turns to you and says, 'Get into a fighter and get out there!'
'I've had some basic flight training,' you say. 'Get into an X-wing! We need all the help we can get,' says the captain. 'Just stick by your wingman and you'll be fine.' A few minutes later, you're strapped into a snubfighter and flying into a space battle.
You're lucky enough to survive the space battle and even get your X-wing back aboard the Champion safely. 'They tell me you're not an experienced snub pilot,' says General Madine, who greets you in the docking bay. 'You have impressed me today. Join me in the Officer's Lounge when you're free.'
After your post-flight debrief, you make your way to the lounge. Wedge and Madine are both there already. 'Your callsign was Vapebait, I don't know if you knew that,' says Wedge with a laugh. 'But you came through with flying colors. Your wingman says you earned an assist on one of the TIE kills.' Good job!'
Scenario 4: City in the Clouds[]
Journey to the criminal underworld of Cloud City to meet with a gang of Ugnaughts.
You've arrived at the Rendezvous Point and you're included in a meeting of high-ranking Alliance officers. 'I overheard a coded message on the Tyrant,' says General Madine. 'With the help of slicers aboard the Champion, we've decoded it. The Tyrant received orders to move to Bespin and support an ambush of Rebel forces there.'
'We must find out the situation on Bespin as soon as possible,' says Wedge. Then he turns to you. 'Get to Cloud City and meet with one of our underground contacts. His name is Yoxgit.'
The next day finds you at Cloud City on Bespin, the floating facility originally built to service the tibanna gas mines of the planet. Disguising yourself as one of the locals, you descend into the lower levels of the city.
In a cantina filled with unruly Ugnaughts, you find your contact. He looks to be the leader of the gang. 'Yes, I am the one you seek,' he says in a whisper as he leans close. 'I was chosen because of my valuable community relations.' He waves his hand toward a table full of Ugnaughts nearby. They smile and raise their drinks.
'I was told that you were well paid for your loyalty,' you say. 'Tell me what you know about Imperial activity on Cloud City.'
'Here's what I can tell you,' says Yoxgit. 'I've looked at both sides of the situation, and I've decided that the Imperials will pay me even more credits when all you Rebels are killed! Get 'em, boys!'
The surviving members of Yoxgit's gang have run away. Their leader lies on the ground and cowers. 'I'll tell you what you want to know!' says Yoxgit. 'Don't kill me!' You don't bother to pursue the rest of his gang as they escape into the dark streets below Cloud City.
Scenario 5: Hunting the Hunter[]
Tangle with the best bounty hunter in the galaxy as he tries to escape with a precious cargo.
'Just put that blaster down! I'll tell you everything!' says the Ugnaught gang leader Yoxgit. 'I want to know about the Imperials,' you say. 'What are they doing on Cloud City? This is supposed to be an independent station.'
'It's the new administrator,' says the Ugnaught. 'Calrissian made a deal with Vader. He probably regrets it now! Anyway, one of your Rebels has been frozen in carbonite.'
'Frozen in carbonite? Who is it?' you say.
'I don't know why the Imperials are so interested in a Corellian smuggler,' says Yoxgit. 'His name is Solo. Han Solo.'
'He's a captain in the Alliance!' you say. 'We've got to rescue him. Where is he now?'
'A bounty hunter took possession of your frozen captain,' says the Ugnaught. 'Name is Boba Fett. You'd better hurry, he's making his getaway right now.'
They say Fett is the best bounty hunter in the galaxy. If he's working for the Empire, then the whole Rebel Alliance is threatened. You head for the landing pad and see a Firespray attack craft there. It's Boba Fett's Slave I, his personal starship.
The carbonite slab containing Solo's frozen body is moving towards the loading ramp, hovering on repulsors and escorted by stormtroopers. The swirl of a cape follows, revealing Boba Fett in full battle armor.
'Stop right there, Fett!' you say. 'You're not taking Solo anywhere!
'He's mine now!' says Fett. 'He's worth a lot to me, and you're not going to slow me down.' Fett's jetpack ignites and as he rises, he fires his blaster.
Boba Fett is a formidable enemy. Aided by a squad of Imperial stormtroopers, he holds off your attack. When the Imperials are finally defeated, Fett makes good his escape, taking the frozen carbonite body of Han Solo aboard Slave I. All you can do is watch helplessly while his ship rises from the docking pad and then blasts away into space.
'That's what the Imps were up to on Cloud City then,' says Wedge over the comlink. 'Now we know that Fett has Captain Solo, we can get started on a plan to rescue him. You've been an asset to the Alliance. Return to the Rendezvous Point. We have an officer's commission waiting for you. There's a lot of work still to be done if we're going to defeat the Empire.'