| This article relates to an element of Star Wars Galaxies prior to the New Game Enhancements. It is no longer accurate and remains for historical purposes only. |
Mellichae
Info[]
Mellichae is a Dark Jedi, who commands the Sith Shadow forces into constant attacks on the village of Aurilia. He is a Zabrak with a cybernetic arm and is always accompanied by Daktar Bloodmoon.
Force Sensitive Quest[]
Info[]
After completing 6 full branches in Force Sensitive professions at the village of Aurilia a force sensitive character will once again receive a visit from the Old Man. He has a final quest: Find Mellichae at this camp and kill him. If you succeed, you will be directed to a Force Shrine where you can begin the Padawan Trials.
A waypoint will appear in the datapad, pointing to a location usually not too far from where one is visited by the Old Man, and on the same planet. At the camp you will find Mellichae (CL85, can someone confirm?) and Daktar Bloodmoon (CL100). They are guarded by 3 Sith Shadow Mercenaries and 2 Sith Shadow Thugs (CL77). Surrounding the camp are 4 Force Crystals.
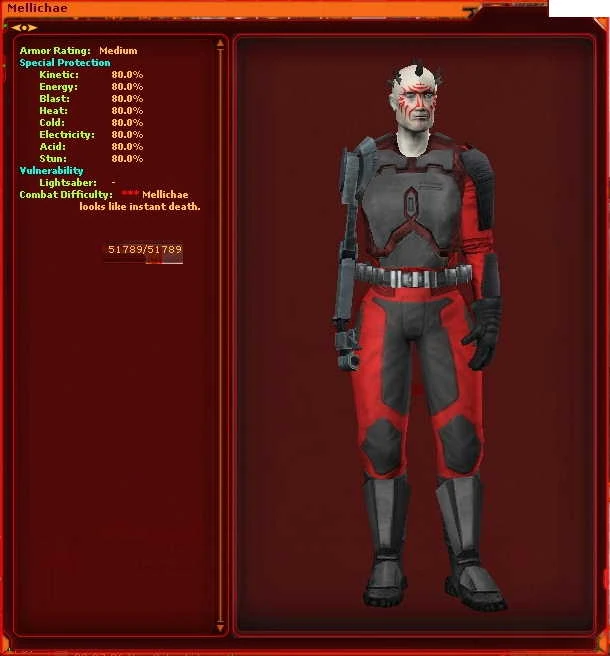
- Mellichae: Combat Level 85. 55k HAM, 80% resists to everything except lightsaber damage. He uses a lightsaber and Force powers.
- Daktar Bloodmoon: Combat Level 80. 25k HAM, 80% resists to everything.
- Sith Shadows: the same as you find around the village of Aurilia.
- Force Crystals: 40k HAM. These are static objects and surround the camp in a diamond-shaped layout. They are surrounded by light smoke which is of either red or green color. These constantly heal Mellichae and Daktar.
Tactics[]
- The key to defeating Mellichae is order and sticking to the plan. Keep your group in line and everything will go fine.
- You will need some raw force to beat these guys. CL85 and CL80 with 80% resists and force powers is no small matter. A full group of CL80's should have no problem, it could even be done with 2 or 3 people. Tactics and coordinated fighting is key however. Even a full group can have problems if they don't think while they fight.
- Force crystals: These need to be taken out first, or they will heal Mellichae and Daktar making it an almost impossible fight. However there are a few things you need to take into account:
- Always destroy the green crystal first. It's actually not a green crystal, but the smoke surrounding it that's green. Same thing really :) Take it out at maximum distance using any rifle and you should be able to take them all out one at a time without getting aggro. If you see a Sith Shadow Thug or Mercenary wander too close and do get aggro, take care of him first, then return to hitting the crystal. Once the green crystal is destroyed, one of the remaining red crystals will turn green, and that's the one to go for. Repeat this until all crystals are taken care of.
- There is/was a bug where a crystal could not be destroyed if anyone besides the force sensitive person who needs to kill Mellichae damages the crystal. There's been speculations where it only happens when it's hit by melee damage, etc... To be safe, only let the person doing the quest hit the green crystal using a rifle at maximum range. Until the specifics of this bug are confirmed or until it is fixed, this is the safest way to guarantee success. (Update: this bug was fixed in Publish 19)
- Once all the crystals are destroyed, Mellichae will call out for reinforcements. It's best to be prepared at this point!
- While the person doing the quest is busy destroying the crystals, let the rest of the group start by taking out the Sith Shadow Thugs and Mercenaries. They can be single pulled if careful, or if your group can handle it you can even pull them all without aggroing Mellichae and Daktar. It might be worth it to hold off destroying the last crystal until all thugs and mercenaries are dead.
- Once all crystals are destroyed, Mellichae calls out for reinforcements and half a dozen or so (anyone confirm the actual number?) more Sith Shadows spawn in the camp. Try to take these out without aggroing Mellichae and Daktar or the fight gets that much tougher.
- Now only Mellichae and Daktar Bloodmoon are left. There are several different tactics to try:
- Have a good tank pull both Mellichae and Daktar, then let the rest of the group (which includes the person doing the quest) pull Mellichae off him. Kill Mellichae while the tank keeps Daktar busy and that should be enough to conclude the quest (don't forget to loot!). After that you can finish off Daktar if you want, or just run away.
- Single pull Daktar. This can be tricky as they are both very close to each other. The best way is to use a Body Pull, which is where you line yourself up with both Daktar and Mellichae in the same line of view, with Daktar being closest to you. Then inch forward into aggro range until you see a '?' appear over Daktar. Inch closer until he aggroes (shown by the '!' above his head) and then pull back while he follows you. There is no guarantee that this pull will work, so be prepared to fight Mellichae aswell if you try it like this. Alternatively you can pull him by using the pet attack/follow trick, but personally I'm not too fond of this 'feature'.
- Single pull Mellichae using the same pulling technique as described above. Mellichae is rumored to have better line of sight than Daktar so this might stand a better chance of working than single pulling Daktar.
- Aggro Mellichae and burst run away from the camp. At a certain point Daktar will abandon the chase and only Mellichae will be left to fight. I would personally not recommend this tactic as it might cause the camp to despawn when Mellichae goes out of reach. (can anyone confirm this?)
If you die[]
If you die and fail the quest, shuttle to a different city and the waypoint to Mellichae's camp will return. (unconfirmed)
Loot[]
- Mellichae drops his cybernetic arm after death, it has no stats and could be equipped only for the looks.